


RV holding tank sensors can be a constant source of frustration for campers. Is the black tank actually full? I know my gray tank is empty, why are my sensors indicating that there’s liquid inside? These troublesome questions all stem from the fact that RV holding tank sensors can easily misread because of waste, debris, and grease present in your holding tanks (among other reasons).
One of the best ways to avoid misreading sensors in your RV holding tanks is to understand how they work, and learn how to clean them properly. In this guide, we’re going to give you the rundown about RV holding tank sensors, help you restore them, and answer your most burning questions.
Key Points About RV Holding Tank Sensors
- RV holding tank sensors function as an electrical circuit where the rising water levels in your holding tanks complete the circuit and light up the corresponding level gauge.
- RV holding tank sensors are challenging to maintain because they are usually located on the deepest end of the tank near the discharge port, meaning that when you open the valve to dump the tank, all of the liquid and waste is pushed to the wall where the sensors are positioned.
- Misreading RV holding tank sensors can be caused by debris covering the sensors, mineral deposits, wiring problems, or control problems.
- We recommend using Unique Restore-It to clean RV black tank sensors, and Dawn Ultra dish soap for cleaning RV gray tank sensors. You may have to clean your holding tank sensors more than once to restore them.
How Do RV Holding Tank Sensors Work?
RV holding tank sensors are typically mounted to the holding tank through a hole in the tank, positioning the sensor head inside of the tank, the wire connection outside of the tank, and a rubber bushing or grommet that creates a water-tight seal between the two.
RV sensors are typically situated either vertically or diagonally at four or five levels on the holding tank wall and should be evenly spaced in quarters or thirds. The actual number of sensors varies across different RV models.
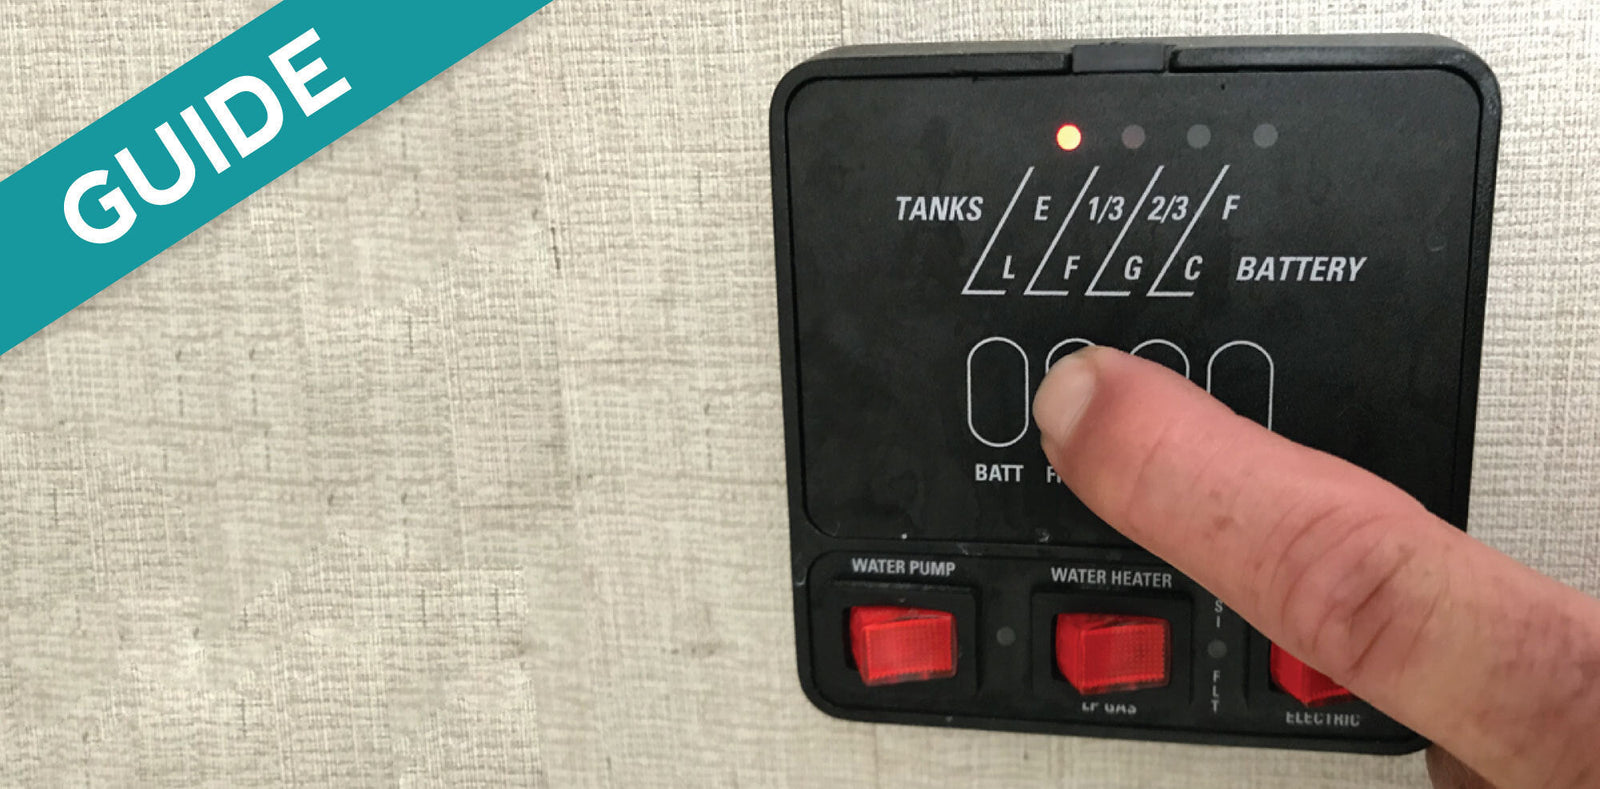
When the liquid level in your holding tank reaches each sensor, the circuit is closed between that sensor and the “ground” sensor located near the bottom of the tank. When you press the button on your control module in the RV, a low voltage signal is sent from the control to the corresponding holding tank. As you check the level of the tank, if the liquid level is touching the ⅓, ⅔, or full sensor, it will close the circuit between the sensor at the liquid level and the “ground” sensor near the bottom of the tank. The liquid acts as a conductor, and closes the circuit between the two sensors.

Important Note: Not all RV holding tank sensors are perfectly spaced inside the tank at the factory for accurate readings. In fact, we’ve spoken with many RVers who’ve discovered that their sensors are installed with spacing that is not even close to thirds or quarters, which can be very frustrating. While there are plenty of RVs with sensors that are correctly positioned and installed, keep this in mind if you find variances in sensor accuracy.
Garnet SeeLevel RV Holding Tank Sensors: A More Reliable Option
If you’re constantly dealing with misreading RV sensors, Garnet SeeLevel holding tank sensors have been available for aftermarket installation for over 30 years, and are still the most reliable, go-to sensors for RV holding tanks.
SeeLevel RV sensors are installed on the exterior of the holding tank, which makes them:
- Easier to install correctly.
- Less likely to misread as a result of internal tank debris.
SeeLevel RV holding tank sensors read in 1% increments from 0-100%, offering a far more accurate liquid level on the display, and can be installed on RV freshwater, gray water, and black water holding tanks.
Although there are no physical parts of SeeLevel tank sensors for debris to get stuck on internally, like sensor heads in typical holding tanks, debris can still get stuck on the holding tank walls where they are installed, causing them to misread.
The difference is that SeeLevel RV holding tank sensors are easier to restore, and can even be cleaned and restored with the same methods we provide later on in this article, which means they don’t require additional maintenance or upkeep.
SeeLevel holding tank sensors are now being installed by manufacturers on new RVs, typically for larger, high-end Class A, 5th Wheels, in addition to high-end Class B’s, and Travel Trailers.
Important Note: No RV holding tank sensors are perfect, and SeeLevel RV tank sensors can still be affected by damaged components or wiring issues.
What Causes RV Holding Tank Sensors to Misread?
RV holding tank sensors are circuits that are completed by rising water levels in your holding tanks, which means that they can malfunction for a variety of reasons.
Debris
The most common reason that RV holding tank sensors stop working is when removable debris like human waste, toilet paper, grease, or food particles cover the sensor, hanging off of it into the liquid below.
When this occurs, the debris can complete the circuit, causing the sensor to falsely indicate that the water inside the holding tank has reached that level. How does this happen? When an object that can conduct electricity is shorting the path of the circuit, it changes the resistance that the control board is looking for under normal conditions. This will cause the control board to display a misread of the liquid level.
If debris is the problem you’re dealing with, the problem can be fixed by cleaning the debris off of the sensors, allowing them to read accurately again.
Debris in Black Tanks
In black tanks, if toilet paper is caught on one of the black tank sensors and is hanging down into the liquid at the bottom of the tank, the circuit will close and show that there is liquid in the tank even if you just dumped the black tank.
Debris in Gray Tanks
In gray tanks, food debris can close the circuit between a sensor and the liquid in the tank. However, it’s more common for a film of grease from food, soaps, shampoos, body oils, and other materials to stick to the holding tank wall where the sensors are positioned, which can make paths where water runs from the sensor to the liquid below and closes the circuit.
Mineral Deposits
Another reason that RV holding tank sensors can stop working is when non-cleanable mineral, calcium, or hard water deposits cover the sensor and prevent it from functioning properly.
Mineral deposits can often not be cleaned effectively, and sensor replacement should be considered.
Wiring Problems
RV holding tank sensors can also malfunction if there is a wiring problem. For example, there might be a broken wire from a ring terminal, wire insulation could rub through causing the wire to ground, or the wire might be pinched.
In these instances, the damaged wire will need to be repaired or replaced to fix the problem.
Control Problems
This is the least likely cause of RV holding tank sensor problems, but poor connection at the Molex connector to the circuit board, failed resistors, etc. can also prevent sensors from working.
If the control board has suffered damage, it will need to be fully replaced in order for your sensors to read correctly.
How to Clean Your RV Holding Tank Sensors
Now that we’ve covered how RV holding tank sensors work, and what can cause them to malfunction, we’re going to provide the steps you need to clean them safely and effectively.
How to Clean Black Tank RV Sensors
For black tank sensors, we recommend using Unique Restore-It, a product that utilizes bacteria and enzymes to clean and restore your sensors, ensuring accurate readings and a worry-free RV experience.
Steps for Cleaning RV Black Tank Sensors
Below are the steps for cleaning your RV black tank sensors. For more detailed instructions, refer to our guide: Steps for Cleaning Black Tank Sensors
1. Close RV Black Tank Valve
Regardless of the type of camping you’re doing, you should always keep your black water tank valve closed unless actively dumping. Keeping your RV black tank valve closed helps prevent clogs, pyramid plugs, and foul odors in your camper. Guide: Why It’s Crucial to Keep Your RV Black Water Valve Closed
2. Fill RV Black Tank With Water
Restore-It can only clean where water is touching, so filling your tank completely allows the treatment to clean your misreading sensors.
You can fill your tank (until water begins to back up into the toilet bowl) in several ways:
- By holding down your flush pedal
- By using your onboard rinser (if your RV is equipped with one)
- By using a tool (like a hose, rinse wand, etc)
Be sure to monitor the toilet while you are filling the tank to make sure you don’t overflow the tank.
3. Shake Bottle of Unique Restore-It RV Black Tank Sensor Cleaner
Shaking the treatment bottle helps to make sure the ingredients are properly mixed and evenly distributed before being used.
4. Pour 16 Ounces of Restore-It Into RV Black Water Tank Through RV Toilet
Half the bottle is used at a time because some RVers need multiple treatments to completely restore sensor functionality. Each bottle contains two treatments for your convenience.
5. Allow Restore-It to Work for 12-72 Hours, or More!
There is no time limit for Unique Restore-It, and you can confidently let it sit for days, weeks, or months. In fact, the more time you give Restore-It to work, the greater your results will be.
Important Note: We do not recommend using the black tank while Restore-It is working!
6. Open RV Black Tank Valve and Dump the Tank
Always make sure to dump at an approved dumpsite.
7. Rinse RV Black Tank Thoroughly
Our preferred method of rinsing is filling your black tank completely full with clean water, and then dumping the contents. We recommend repeating this 1 to 2 times to most effectively rinse your black tank.
Important Note: This method is far more effective for thoroughly rinsing a tank than using internally mounted tank rinsers, tank wands, or external tank flushers. Our extensive testing of these external devices has proven that they are highly ineffective for the majority of RV wastewater systems. The only way to be sure you’ve drained all the remaining waste out is to routinely fill and dump your tanks.
Video: How to Rinse an RV Black Water Holding Tank
8. Close RV Black Tank Valve
Always keep closed unless actively dumping.
9. Wait 1 Hour to Allow RV Black Tank Sensors to Dry Completely
It is important for the tank to dry completely so you can rule out broken sensors or wiring problems.
When the holding tank is dry, there is nothing to complete the electrical circuit (because water is the conduit). This means that even dirty probes won’t provide readings in a dry tank.
10. Test RV Black Tank Sensors
Fill RV black water tank again to make sure the level gauge shows tank levels correctly.
If the sensors read correctly, dump the tank. You’re done!
If the sensors are still misreading after a second or third treatment with Restore-It, you have two options.
- We recommend trying again with Restore-It, and avoid the temptation to resort to chemicals. Some chemicals included in products like Drano can cause damage to seals, valves, and other components of your tank, we don't recommend using them.
- When your tank is verifiably empty and dry, check your sensors. If they read “full”, it is likely that you have a wiring issue or control board failure.
If you’re not sure whether your RV sensors are dirty or broken, learn how to accurately diagnose the problem: Why Are My RV Sensors Not Working? How Do I Fix Them?
How to Clean Gray Tank RV Sensors
For gray tank sensors, we recommend using Dawn Ultra dish soap because it is the best grease-eating dish soap on the market.
Steps for Cleaning RV Gray Tank Sensors
Below are the steps for cleaning your RV gray tank sensors. For more detailed instructions, refer to our guide: Steps for Cleaning Gray Tank Sensors
1. Fill RV Gray Tank Partially Full With Water
We recommend filling your gray tank about halfway full, and doing this before you go to bed, allowing the treatment to work overnight.
Note: You can measure the amount of water that you are adding to the gray tank by using a flow meter on the garden hose that is connected to the city water supply connection on your RV.
2. Pour Dawn Ultra Down RV Kitchen Sink (12-20 Ounces, or More!)
If you think you’ve added enough dish soap, add a little more. The more dish soap you add, the tougher it will be on stubborn grease inside the tank.
3. Fill Gray Water Holding Tank Completely With Water
Filling the gray tank with water will allow Dawn Ultra to flow past the p-trap bend in the sink, allowing it to mix with the water already in the tank.
Note: The best way to check if your gray tank is full is to look for soap suds foaming back out of your sink or shower lines.
4. Let Dawn Ultra Work Overnight
Allowing Dawn Ultra to work overnight allows it to fight tough grease in your RV pipes and gray tank.
5. Open RV Gray Tank Valve & Dump the Tank
There is a good chance that you’ll see gray or white residue on the bottom of your RV holding tank discharge pipe. This is the grease that was previously clinging to the inside of your holding tank.
Always make sure you dump at approved dumpsites: Where to Dump Your RV Holding Tanks
6. Wait 1 Hour to Allow RV Gray Tank Sensors to Dry Completely
It is important for the tank to dry completely so you can rule out broken sensors or wiring problems.
When the holding tank is dry, there is nothing to complete the electrical circuit (because water is the conduit). This means that even dirty probes won’t provide readings in a dry tank.
7. Test RV Gray Tank Sensors
Fill the RV gray water tank again to make sure the level gauge shows tank levels correctly.
If the sensors read correctly, dump the tank. You’re done!
If the sensors are still misreading, repeat this process the next night, repeating this process until sensors are restored to proper functionality. If after the second of third cleaning with Dawn Ultra, the sensors are still misreading:
- We recommend trying again with Dawn Ultra, and avoid resorting to chemicals. Some chemicals included in products like Drano may cause damage to seals, valves, and other components in your RV holding tanks.
- When your tank is verifiably empty and dry, check your sensors. If they read “full” it is likely that you have a wiring issue or control board failure.
If you want more information about which RV cleaning products are safe, and which ones you should avoid, refer to our guide: Choosing the Right Products or Methods for Cleaning RV Tank Sensors
Get Help With Misreading RV Holding Tank Sensors
If you’ve been following along with our guide and you’re still struggling with your RV holding tank sensors, don’t stress! Reach out to the professional Customer Service Team at Unique Camping + Marine for fast, friendly, and helpful advice about your RV holding tank sensors. Whether you have a quick question that needs answered, or you’re dealing with a massive RV holding tank problem, our team is ready to help you today.
Frequently Asked Questions About RV Holding Tank Sensors
Below we’ve put together a list of the most frequently asked questions about RV holding tank sensors, giving you answers in one convenient location.
1. Why Do RV Holding Tank Sensors Misread?
Misreading RV holding tank sensors can be caused by debris covering the sensors, mineral deposits, wiring problems, or control problems.
2. How Do RV Holding Tank Sensors Work?
RV holding tank sensors function as an electrical circuit where the rising water levels in your holding tanks complete the circuit and light up the corresponding level gauge.
3. Can I Clean RV Holding Tank Sensors Myself?
Yes! You can clean RV holding tank sensors by filling your holding tank with fresh water in combination with a high-quality sensor cleaner (Unique Restore-It) or grease-eating dish soap (Dawn Ultra), allowing the treatment to clear off stubborn debris, and thoroughly rinsing the tank afterwards. You may have to clean your holding tank sensors more than once to restore them.
4. What Products Should I Use to Clean RV Holding Tank Sensors?
We recommend using Unique Restore-It to clean RV black tank sensors, and Dawn Ultra dish soap for cleaning RV gray tank sensors. You may have to clean your holding tank sensors more than once to restore them.
Important Note: Avoid using harsh household chemicals, bleach, or standard drain cleaners, as these products can damage tank seals, valves, and plumbing components.
5. How Often Should I Dump & Clean RV Holding Tanks to Prevent Sensor Problems?
You should dump your tanks every 3-5 days for optimum odor control and clog prevention, thoroughly rinse your holding tanks every time you dump, and deep clean your RV black tank twice per year with Unique Clean-It (season beginning and end for weekend campers) or every 5-10 dumps (for full-time RVers).
6. Do RV Holding Tank Sensors Break, How Can I Tell?
Yes! Dump your RV holding tank completely, and allow the tank to fully dry. When your tank is verifiably empty and dry, check your sensors. If they read “full” it is likely that you have a wiring issue or control board failure.
This method is effective because if your holding tank is dry, there is nothing to complete the electrical circuit because water is the conduit. This means that even dirty probes won’t provide readings in a dry tank.
If your sensor panel shows water levels in the tank, even in a 100% completely dry tank, that is a surefire way to know that you’re dealing with a wiring problem or failed control board.
7. Can I Upgrade My RV Holding Tank Sensors With Something More Reliable?
Yes, aftermarket sensors like SeeLevel RV Tank Sensors are a great option if you want more reliable readings on tank levels. This is possible because having sensor probes positioned outside of the tank means that waste and grease cannot stick to the sensors and cause them to misread.
8. How Can I Prevent Misreading RV Holding Tank Sensors?
You can help prevent misreading RV holding tank sensors by following The Unique Method. After 30 years of solving wastewater issues professionally, Unique Camping + Marine developed these easy-to-follow guidelines for effective odor elimination, solid waste breakdown, and effortless sensor cleaning.
9. Why Do Gray Tank Sensors Misread if the Tank Only Holds Sink & Shower Water?
RV gray water holding tanks accumulate soap scum, grease, oils, and even mold and mildew from shower and kitchen wastewater. This film can coat the holding tank sensors, leading to inaccurate readings over time.
10. Do Extreme Temperatures Affect RV Holding Tank Sensors?
Extreme tank temperatures are not the primary cause of RV holding tank sensor malfunction, but temperatures above or below the ideal tank temperatures of 45-85°F [7-29°C] can cause contents to dry out or freeze faster, resulting in debris sticking to sensors and tank walls.