

Want to watch an instructional video on this topic? Click Here!
Leaky RV toilet seals can be frustrating, especially when they leave you with a mess.
That’s why we’re going to provide you with step-by-step instructions about how to replace a ball valve gasket. This gasket is designed to create a watertight seal on the toilet in an RV.
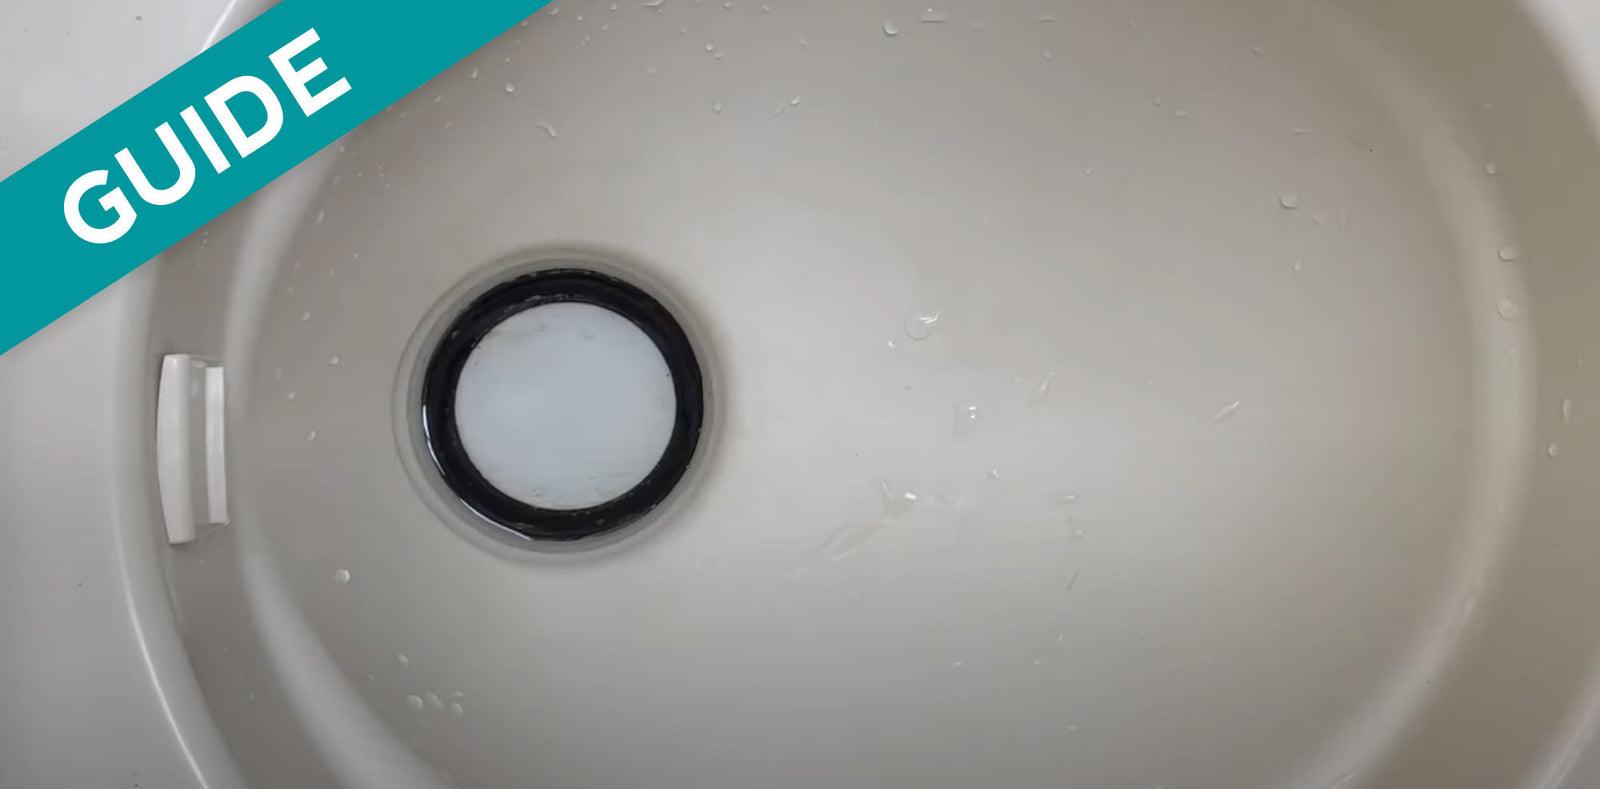
The ball valve gasket is located in between the toilet bowl and the ball valve. Over time the gasket can slowly start to leak and allow water to drip out of the toilet bowl, which can lead to floor damage, unsanitary conditions, and foul odors in your RV — certainly not ideal while camping.
If you have a Thetford RV toilet, you’ll need to follow alternate instructions found here:
DIY RV Toilet Repair: How to Replace Parts on a Thetford Aquamagic Style 2
Step-by-Step Instructions for Fixing Leaky RV Toilet Seals
Replacing the ball valve gasket in an RV toilet is a simple and easy process, and knowing how to do this small repair can help get you back on the road in no time.
How to replace the ball valve gasket on Dometic 300 series RV toilets:
- Disconnect water to the RV.
- Turn off the water pump at the control panel.
- Put on protective gloves.
- Hold the ball valve open: Letting any remaining water in the toilet bowl drain out.
- Remove the leaky gasket: Pull the gasket down to disconnect it, take it out of the flush valve opening (the hole in the toilet), and dispose of it accordingly.
- Clean the toilet bowl and flush valve opening: Clean any lingering debris from removing the gasket, and to prepare to install the new one. This can be as simple as taking some toilet paper (our preferred brand is Angel Soft), and wiping down the area thoroughly.
- Install the new gasket: Look closely at the gasket, as most indicate which side should be facing up for easy installation. There should be a small lip on the flush valve opening where the gasket connects. While holding the ball valve open, be careful not to drop the gasket as you position it inside the hole.
- Ensure the gasket is fully connected: Check to make sure it is connected all the way around. This might take a moment, and may require both of your hands to get it in place.
- Close the ball valve.
- Turn the water pump back on, and reconnect water to the RV.
- Add water to the toilet bowl to test the new gasket: Let the water sit in the bowl to test if the gasket holds the water properly.
After following the instructions above, you should have successfully replaced the ball valve gasket in your RV’s toilet.
Seal the Deal: Leak-Free Camping Ahead
By taking the initiative to replace a leaky toilet seal, you’re not just stopping drips — you’re preventing odors, water damage, and bigger repairs down the road. Secure seals keep your RV bathroom reliable, clean, and comfortable, so you can enjoy every minute of the journey.
If you find that the gasket isn’t holding water properly, you’re dealing with a leak elsewhere, or simply need help with your RV toilet, don’t hesitate to reach out to the friendly and professional Customer Service Team at Unique Camping + Marine.

Prevent Common Problems In Your Tanks!
From misreading sensors, preventing clogs, or eliminating odors, we've got you covered no matter how you camp! All our best holding tank tips and trick information plus more can be found conveniently in one place when you download our FREE Unique Method Field Guide PDF. Achieve holding tank bliss today!
Get The Free Download Get The Free Download