


A sticky RV black tank valve can turn a routine stop at the dump station into a stressful chore. If your valve is difficult to open, won’t close completely, or feels like it’s getting worse every time you use it, the problem may be caused by buildup inside the valve or along the tank outlet.
Fortunately, a sticky black tank valve doesn’t always mean you need to replace the entire assembly.
In this guide, we’ll explain what causes RV black tank valves to stick, how to safely clean, lubricate, and fix the problem, how to replace a black tank valve, and how to prevent sticky valves in the future —- all to help make your dumping experience less of a hassle.
Want to watch a video on this subject? Click here!
Key Points About RV Black Tank Valves
- An RV black tank valve is a sliding gate mechanism that keeps wastewater inside your black tank until you’re ready to dump at a proper disposal site.
- RV black tank valves can get stuck for numerous reasons including: not using enough water in your RV, infrequent tank rinsing, leaving the black tank valve open, lack of lubrication, cold weather, and mechanical failures.
- The best way to open a stuck black tank valve is to rinse the black tank and knife valve with fresh water and Unique Clear-It, which can help break up stuck or hardened waste and debris.
- You can prevent sticky RV black tank valves by rinsing your holding tanks after every dump and keeping the valve shaft lubricated with silicone dry lube.
What is an RV Black Tank Valve
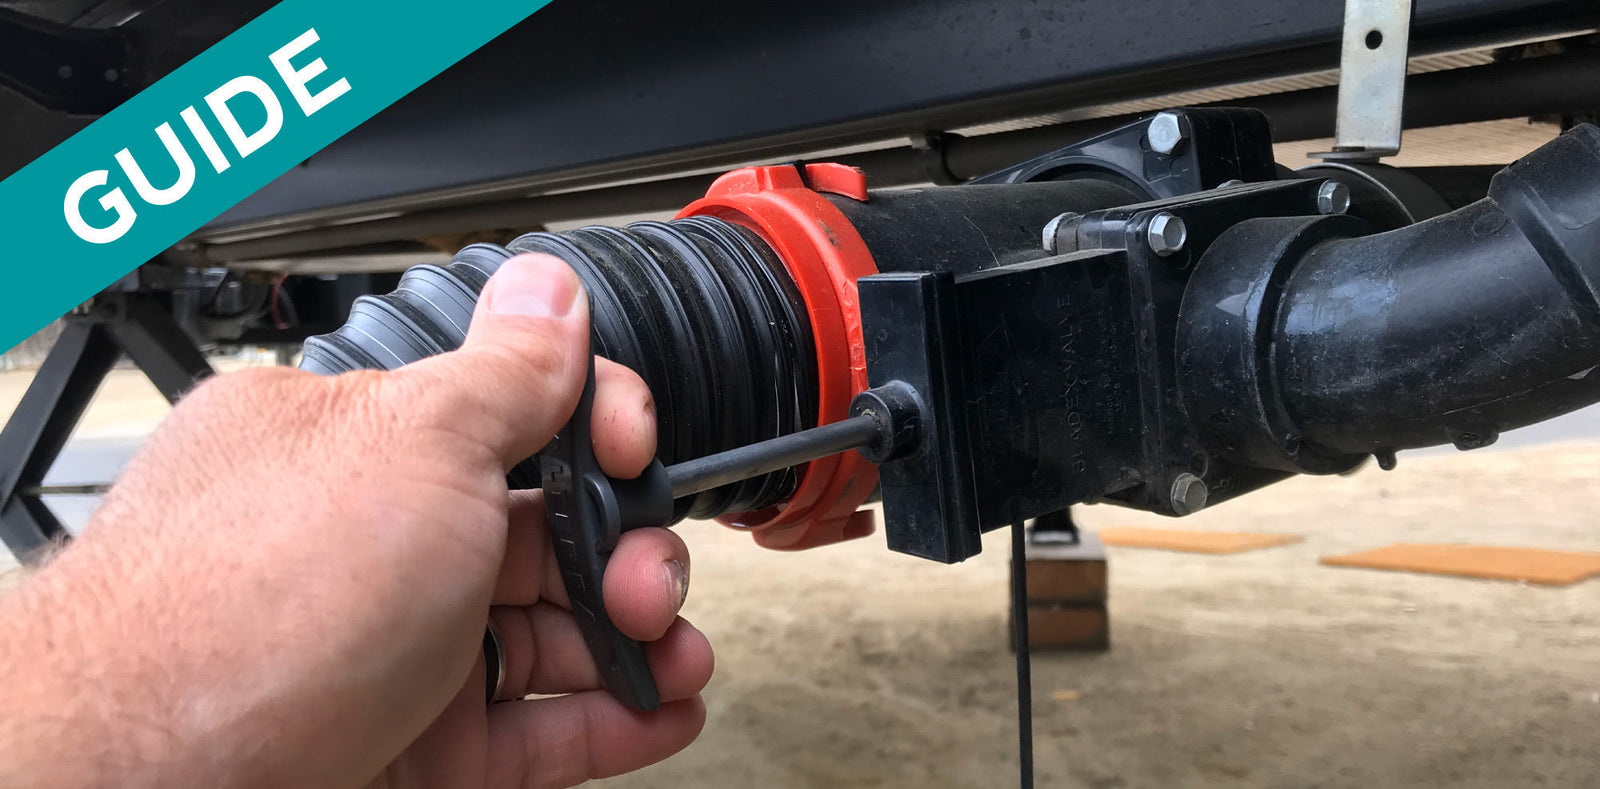
An RV black tank valve is a sliding gate mechanism that keeps wastewater and sewage inside your vehicle’s black water holding tank until you’re ready to dump at a proper disposal site.
RV black tank valves use a flat knife blade that slides open and closed inside a sealed plastic or metal body. It connects to the large, 3-inch diameter sewer pipe that is specifically designed to let solid waste flow freely out of the tank.
Where is the Black Tank Valve Located?
If you’re newer to RVing, you may be wondering, where is the black tank dump valve located?
An RV’s black tank valve is generally located on the driver’s side, close to the main sewer outlet pipe, and usually features a black pull handle that is larger than the gray tank handle — but the answer really depends on your specific setup:
- Standard Knife Valves: On many modern RVs, the valve handles are grouped together inside an external utility compartment (also known as the wet bay or termination area) along the low-point sewer connection.
- Older or Simpler Travel Trailers: The black tank valve handle may stick out directly from the underbelly or frame rail near where the black tank is located.
- Complex Systems: Typically require you to press a button or use a phone app to dump the tanks, and are generally harder to locate, maintain, and service.
Cable System Black Tank Valves
Cable pull systems are very similar to simple knife valves because they manually push and pull the valve open and closed. However, the difference is that rather than a simple stainless steel shaft and plastic handle, there is a length of cable connecting the knife valve blade to the push/pull handle.
The cable is run through a plastic or mesh woven conduit (similar to a bicycle brake cable), and allows the cable to open and close the valve while keeping it protected from other moving parts in the RV undercarriage and storage areas.
Important Note: If you have a cable system for your black tank valve, it may be possible to lubricate the cable, or replace the cable or conduit, but this is often difficult due to the system’s remote location. For these systems, we recommend having your system repaired or replaced by a certified RV technician or service center.
Electric System Black Tank Valves
Electric discharge valves use an electric motor connected to the knife valve that opens or closes when commanded by a switch or application (phone app or electric control board).
Whether the electric system relies on wires and a switch or a wireless signal to activate the motor, these valves are often positioned in difficult-to-reach locations.
Important Note: If you have an electric system for your black tank valve, we recommend having it serviced or replaced by a certified RV technician or service center.
How to Open Black Tank Valve
When you’re connected to the dump station and you’re ready to dump, use the following steps to open an RV black tank valve:
- Locate the Handle or Button: Find the labeled black tank handle (usually the larger handle, separate from the gray water handles) near your RV's waste outlet or side panel.
- Pull Straight Out: Pull the rod firmly and steadily outward. Do not twist or force it sideways, which can bend the shaft or break the handle.
- Handle Pressure: If the tank is completely full, weight and suction can bind the gate valve blade. Crack the valve open just a fraction of an inch first to relieve pressure, then pull it all the way.
- Push to Close: Once the tank is empty, push the handle firmly back in to close the valve.
To learn the basics about using RV dump stations, review our helpful guide: How to Use an RV Dumping Station
How to Use an RV Black Tank Valve
Using a black tank flush valve is very straightforward.
Proper black tank valve operating steps include:
- Keep it Closed: Always keep your RV black tank valve closed unless actively dumping.
- Connect the Hose: Attach your sewer hose firmly to the RV termination outlet and connect the other end to the sewer outlet. Make sure all hose connection points are making contact with the bayonet fitting, because missing one may lead to a leak between the connection.
- Pull the Valve: Pull the handle to open the black tank knife valve and let the contents drain completely.
- Rinse Holding Tanks: Thoroughly rinse your holding tanks after every dump.
- Close Up: Close the black tank valve securely when finished, and then disconnect, rinse, and store your sewer hose.
For more detailed guidance, read our guide: How to Dump Your Black and Gray Water Tanks
Why is My RV Black Tank Valve Sticky: 6 Common Reasons
RV black tank valves can get stuck for a variety of common reasons, but we’re going to focus on the six major causes.
1. Not Using Enough Water
One of the main causes of a sticky black tank valve is debris and waste buildup.
If you’re not using enough water in your RV, or don’t wait for the holding tank to be at least two-thirds full before dumping, you won’t have the strong rush of liquid needed to carry all waste and debris out of the tank.
As a result, leftover toilet paper and solid waste can get trapped in the track where the sliding plastic knife blade seats when closing, causing the black tank valve to get sticky.
Learn more how important water usage is for your RV: Why Using Lots of Water in Your RV Toilet and Black Tank is Crucial
2. Infrequent Tank Rinsing
Lingering waste and debris can also cause sticky black tank valves if you haven’t established good tank rinsing habits.
When dumping the black water holding tank, it’s tempting to let everything flow out of the tank all at once and get back on the road without properly rinsing the tank. This can often occur when there is a line at the dumping station, or during times when you’re in a hurry and need to get on the move.
However, without proper rinsing, once you close the black tank valve, any sludge left behind from the initial dump can get pushed into the pathway where the knife blade is located, and can get stuck between that and the gasket which seals it off.
For pro tips about effective holding tank rinsing, read our guide: How to Rinse an RV Holding Tank
3. Leaving the Black Tank Valve Open
If you leave the black tank valve open, liquids drain away, causing solids to dry and harden around the rubber gaskets and blade.
As you let the RV sit, either while not in use or while you’re driving, air dries out everything around the black tank valve, which can make the valve feel sticky.
Learn more about why proper valve usage is so important for your RV: Why You Should Keep Your RV Black Water Valve Closed
4. Lack of Lubrication
Another reason you can experience a sticky black tank valve is from the shaft itself. The shaft is what allows you to open and close the black tank valve by pulling it open.
The shaft of a black tank valve is a lubricated piece, and if it is no longer lubricated, it can become very difficult to open and close the valve.
5. Cold Weather
Trapped moisture or residual liquid around the black tank valve can freeze in cold temperatures, locking the mechanism solid.
Some helpful tips for frozen black tank valves include:
- Using a hair dryer or heat gun (carefully) near the valve to melt any ice.
- Insulating your black tank and valves with heat cables or heat tape.
- Keeping your RV’s underbelly insulated during winter months with RV skirting.
Learn more about how to protect your RV in cold weather with our guides:
6. Mechanical Failure
Over years of use, internal rubber seals can warp, dry out, or slip out of alignment, creating extreme friction against the plastic blade.
The internal gate mechanism can also wear out making it difficult or impossible to open.
Identifying mechanical valve failures without a professional can be tricky on RVs. In some instances, you can look into the opening past the sewer hose connection and check for debris or swollen gaskets. However, on the majority of RVs this is very difficult to do because the valves are positioned around a 90-degree fitting which makes it near impossible to inspect (without an inspection mirror or borescope camera).
If you suspect that your black tank valve is failing, we recommend contacting an RV service professional to accurately diagnose and resolve the issue.
How to Unstick an RV Black Tank Valve
If you’re dealing with a sticky black tank valve, we have some expert advice about how to fix the problem with step-by-step instructions.
1. Fill RV Black Water Holding Tank With Fresh Water.
Water is one of the best things you can add to an RV holding tank, and the most reliable way to break debris that may be causing the black tank valve to stick is by filling your tank completely with fresh water.
2. Crack Open the Black Tank Valve.
Make sure the water line is well above the discharge port, and gently crack open the black tank valve by pulling the pole approximately ¼”, and then slowly opening the valve.
This process will force water through the smaller opening, and allow the high-velocity wastewater to help break the debris that’s built up inside of the tracks and across the blade itself.
3. Work the RV Black Tank Valve.
Once you have the black tank valve blade full open, work it back and forth several times while water is still rushing through. This will allow lingering debris to break free from the track of the blade, removing the main source of the problem.
Sometimes, simply allowing water to run through the valve isn’t enough to clear hardened or built-up debris in the gasket chamber between the knife valve and the rest of the assembly.
If you’re still struggling with a sticky black tank valve after following steps 1-3, proceed to step 4.
4. Connect a Secondary Valve.
It is necessary to connect an additional bayonet-fitting knife valve to act as a backup seal, especially if you’re dealing with very heavy buildup.
The secondary valve will allow you shut off water flow and prevent water from leaking out of the tank and the original black tank valve assembly.
5. Add More Water to the RV Black Tank.
With the original RV black tank valve in the open position, and the secondary valve in the closed position, add water to the black tank so that it fills the space between the two valves completely.
This may require quite a few gallons of fresh water.
6. Pour One Bottle of Unique Clear-It into the Black Tank
Once the secondary valve is attached in the closed position and everything is submerged, add one bottle of Unique Clear-It into the black water holding tank through the RV toilet, and allow it to sit for as long as possible.
This will allow Clear-It to break down any waste and toilet paper that may be caught in between the gaskets.
Sometimes, Clear-It can remove waste build-up overnight (8-12 hours), however, if the build-up is significant, it may take a full 24-72 hours.
There is no time limit for Clear-It, in fact, the longer you let it work, the better your results will be.
7. Work the Black Tank Valve Again
Before you open the secondary valve to dump, move the original black tank valve back and forth a few times to help clear out anything which might be stuck in there.
Usually, this simple process is all you need to break through debris and toilet paper that may have been stuck in the knife valve. But if you’re still experiencing other issues, we’ve got you covered.
What Happens if Your RV Black Tank Valve is Stuck Open?
Another common problem RVers experience is when the black tank valve gets stuck in the open position.
If You Have Access to the Black Tank Valve
If you can easily access your RV black tank flush valve, there are three methods you can use to unstick your black tank valve:
- Gasket Rinse: Start by rinsing the gasket area with a garden hose with a spray nozzle, or by placing your thumb over the end of the hose to make it spray. This method can help knock debris loose if it is caught between the gaskets.
- Dish Soap Lubrication: You can try pouring Dawn Ultra dish soap in between the gaskets, which can lubricate the valve enough to free it up.
- Black Tank Valve Replacement: If the other methods aren’t effective, or you simply want a fresh start, you can opt to replace the black tank valve itself.
How to Replace RV Black Tank Valve
Sometimes, the best course of action is to replace the black tank valve. Make sure the black tank is completely empty before attempting any repair on the valve.
You will need two wrenches to loosen the screws from the backing nuts. While leaving the original part attached to the RV plumbing, you can replace the two seals and knife valve assembly.
Important Note: Be careful when aligning the seals so they do not get pinched.
If You Don’t Have Access to the Black Tank Valve
If you have a black tank valve that is operated through a wet bay or with a cable system, we recommend following cleaning steps 4-7 above, and utilizing a secondary valve, Clear-It, and plenty of water.
Important Note: Because these types of valves can be difficult to access, you may need to hire a certified RV technician or visit an RV service center to fix the problem.
If You Can’t Move Your Black Tank Valve Handle At All
Sometimes, when valves are left alone for long periods of time, they can dry out and seal themselves closed.
If your black tank valve is completely stuck, try the following:
- Use a Clamp-Spreader Tool: Using a clamp-spreader tool, you can attempt to spread open the valve by positioning the tool between the handle and the valve body.
- Apply Dish Soap: Spray a mixture of water and Dawn Ultra dish soap into the gap.
- Lubricate the Pull Handle Shaft: Spray silicone dry lube on the shaft of the pull handle.
Once you are at a full hookups campsite or dump station, slowly attempt to work the valve open. It helps to move it slowly back and forth with the handle.
After the valve is open and the tank has been drained, spray water directly into the gasket gap that the knife valve sits in to make sure it is fully cleaned out.
How to Prevent Sticky RV Black Tank Valves
Making a few, easy adjustments to your RV maintenance routine can help keep your RV black tank valve from getting sticky.
Preventative Measure: Rinsing the RV Black Tank & Knife Blade
For best results, we recommend thoroughly rinsing your black tank after every dump by filling your black tank completely with fresh water, and then dumping.
The best way to thoroughly rinse your RV’s black tank is to fill it completely with clean water, and then dump the contents.
Repeat this 1 to 2 times to effectively rinse your black tank.
Learn why rinsing your black tank thoroughly is one of the best things you can do for your RV: How to Rinse an RV Holding Tank
Preventative Measure: Following The Unique Method for RV Maintenance
After 30 years of solving wastewater problems professionally, we designed The Unique Method to help prevent 99% of your problems before they even occur.
The Unique Method combines easy-to-follow steps and bacteria- and enzyme-based products that will keep your holding tanks flowing smoothly long term.
By following expert advice including how to use enough water in your RV and keeping your black tank valve closed (unless actively dumping) you can not only prevent sticky black tank valves, but can also look forward to:
- Effective odor elimination
- Efficient solid waste breakdown
- Effortless sensor cleaning
Preventative Measure: Lubricating the RV Black Tank Valve Shaft
Keeping your RV black tank valve shaft lubricated can help prevent it from getting stuck or damaged.
If you’re wondering how to lube a black tank valve, we recommend applying dry lube 1-2 times per year to help keep it moving freely. It is important to use a dry lube, and not something like WD-40, because it can attract a lot of dust that can actually build up inside of the chamber, which is much more difficult to clear.
Whenever you lubricate the shaft, make sure you work it back and forth with an empty tank several times in order to make sure it's sliding easily like it should.
Another good way to ensure the valve stays in good working condition is to open and close the valve several times whenever you dump the tank. This is helpful because the repeated motion can often move potential debris out of the gaskets and allow the valve to operate properly for a long time.
Still Have Questions About How to Fix a Black Water Tank Valve?
If you’ve followed the steps we provided to fix sticky RV black tank valves, and you still need help, don’t worry, we’ve got you covered.
Reach out to the Customer Support Team at Unique Camping + Marine for friendly and professional advice about your RV black tank valves. Our experts can address your specific concerns, and help you get back on the road with confidence.
No More Sticking Points: RV Black Tank Valves Restored
Sticky RV black tank valves can make dumping your tanks much harder than it should be. Whether the stickiness is caused by debris build up in the gaskets or lack of lubrication in the valve shaft, a few easy steps can help fix the problem.
By properly rinsing your black tank after every dump, and keeping your valve shaft lubricated, you can avoid the headache that comes from a sticky, or completely stuck, black tank valve.
If you want more in-depth information on black tank valves, watch this video: Take Apart an RV Holding Tank Knife Valve: How it Works!