

RV holding tank sensors are a constant source of frustration to many RVers, because these sensitive, poorly-made devices are prone to break or malfunction.
When sensors stop working, RVers often struggle to know whether their tanks are actually full or not, which can complicate an otherwise smooth and enjoyable camping trip. In fact, RV holding tank sensor problems are so pervasive that many experienced RVers monitor their own usage, and simply guess when their black or gray holding tanks are full.
In this article, we will walk you through how your RV holding tank sensors work, why they are malfunctioning, and give you resources on how to fix this problem. We will also highlight some helpful ways to prevent misreading sensors, so you are less likely to deal with these problems in the future.
Key Points About Misreading RV Holding Tank Sensors
- RV holding tank sensors function as an electrical circuit where the rising water levels complete the circuit and light up the level gauge.
- RV holding tank sensors typically misread because they are covered by removable debris like human waste, toilet paper, grease, oils, etc. This debris can hold enough moisture or create pathways that connect to liquid lower in the holding tank that is touching the “ground” sensor and completing the circuit.
- RV holding tank sensors can also stop working because of mineral deposits, wiring problems, or control problems.
- If you’ve attempted to clean your RV holding tank sensors multiple times and they still don’t function properly, you may be dealing with mineral deposits or other damage that will require you to replace the sensors or other components in the circuit.
How Do RV Holding Tank Sensors Work?
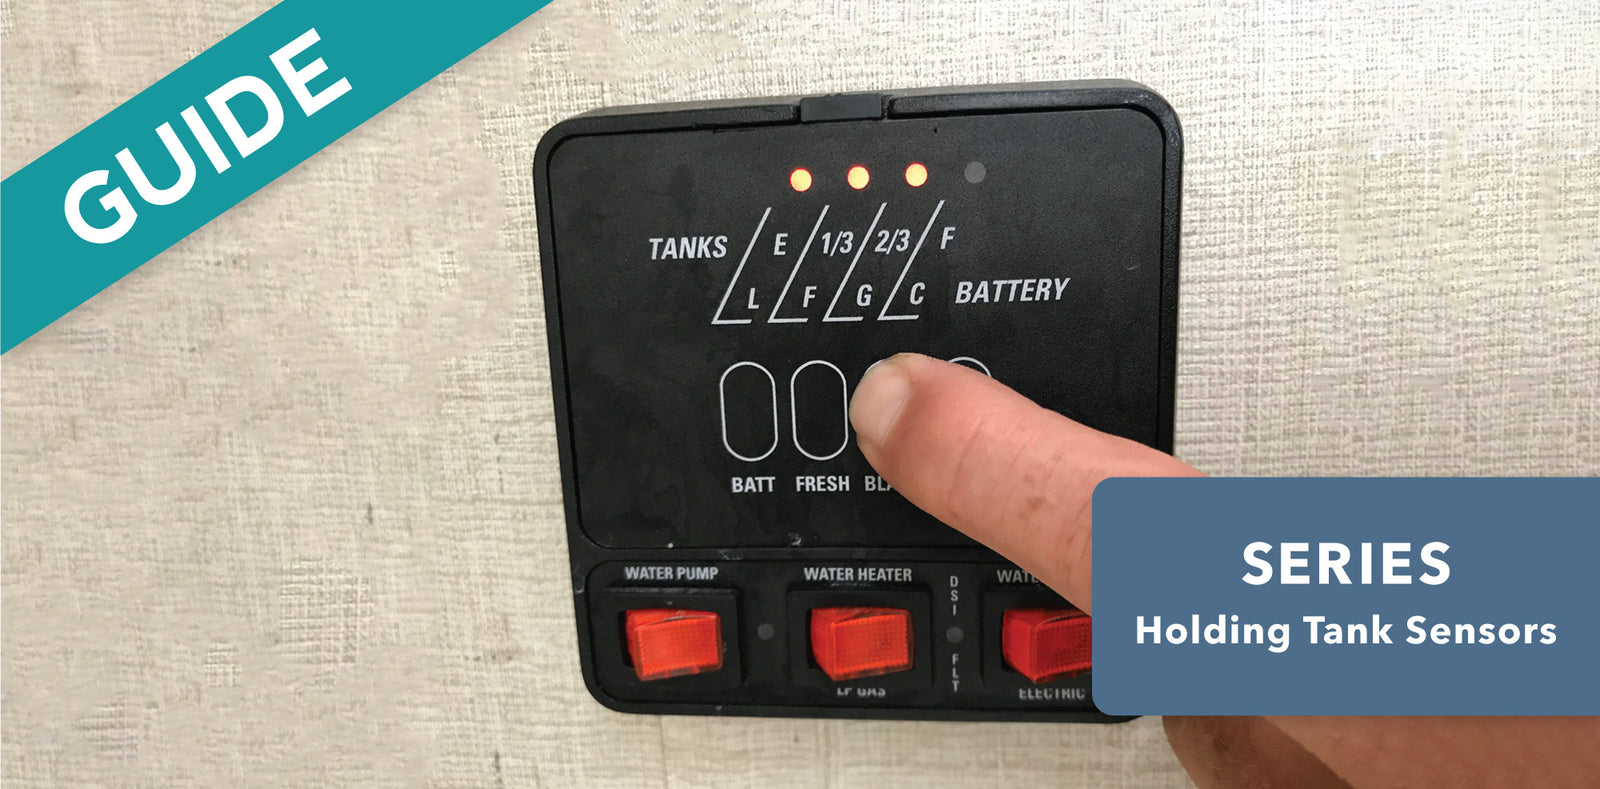
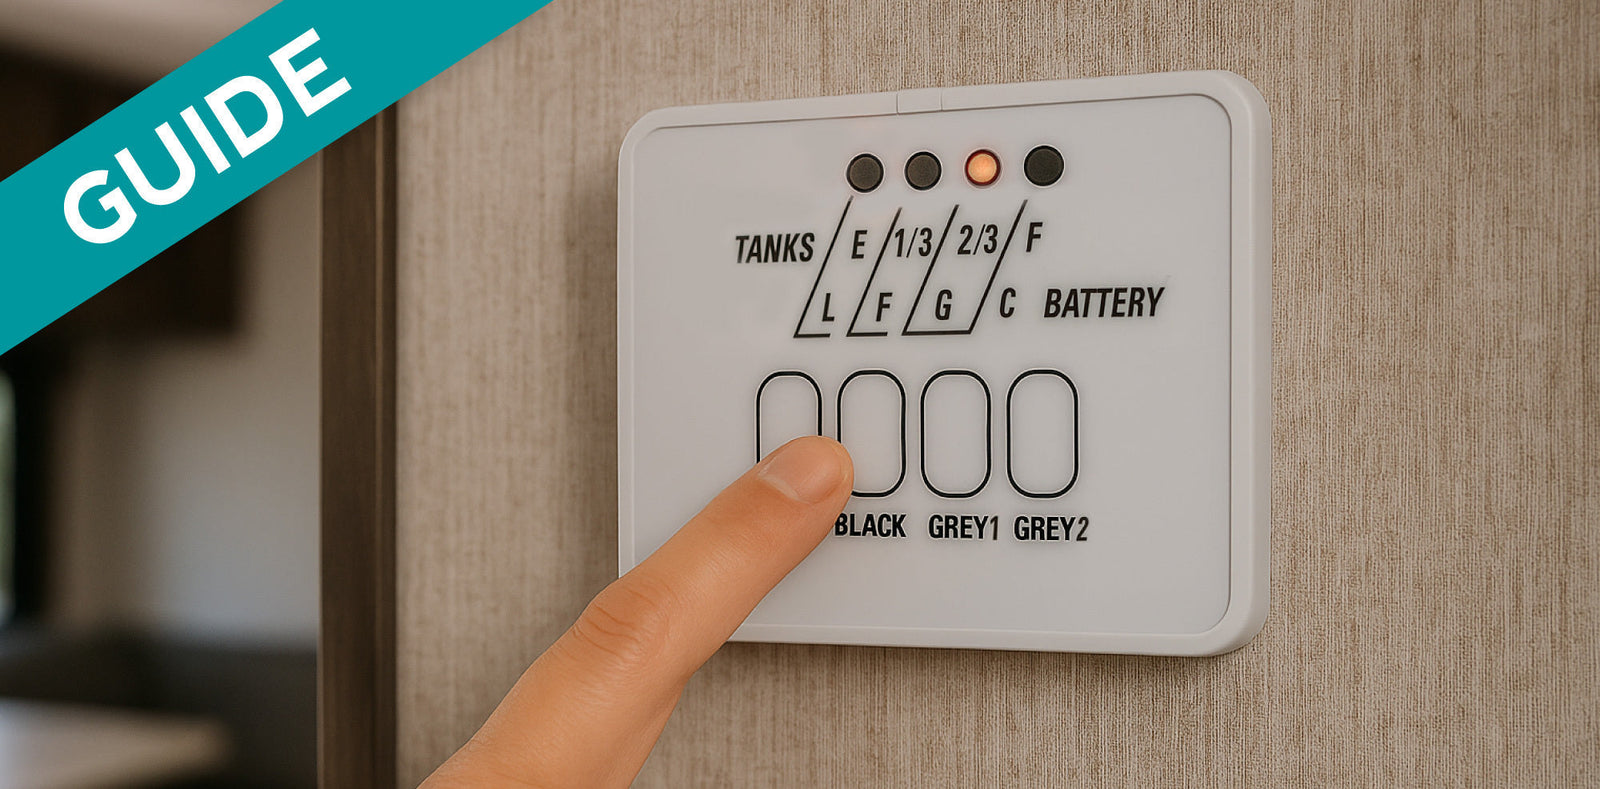
In most cases, RV holding tank sensors are mounted to the holding tank through a hole in the tank, positioning the sensor head inside of the tank, the wire connection outside of the tank, and a rubber bushing or grommet that creates a water-tight seal between the two.
RV sensors are typically situated vertically at four or five levels on the holding tank wall and should be evenly spaced in quarters or thirds. The actual number of sensors varies across different RV models.
When the liquid level in your holding tank reaches each sensor, the circuit is closed between that sensor and the “ground” sensor located near the bottom of the tank. When you press the button on your control module in the RV, a low voltage signal is sent from the control to the corresponding holding tank. As you check the level of the tank, if the liquid level is touching the ⅓, ⅔, or full sensor, it will close the circuit between the sensor at the liquid level and the “ground” sensor near the bottom of the tank. The liquid acts as a conductor, and closes the circuit between the two sensors.

| Measures by Quarters | Measures by Thirds |
|
|
Important Note: Not all RV holding tank sensors are perfectly spaced inside the tank at the factory for accurate readings. In fact, we’ve spoken with many RVers who’ve discovered that their sensors are installed with spacing that is not even close to thirds or quarters, which can be very frustrating. While there are plenty of RVs with sensors that are correctly positioned and installed, keep this in mind if you find variances in sensor accuracy.
Why Are RV Holding Tank Sensors Difficult to Maintain?
Sensors in RV holding tanks are often challenging to maintain because they are usually located on the deepest end of the tank near the discharge port. This means that whenever you open the valve to dump the tank, you are forcing all of the liquid and waste towards the wall where the sensors are located.
Even if your RV holding tank sensors have been functioning properly, there is a chance that dumping the tank can cause debris to get stuck on the sensor and cause it to misread.
Why Are Your RV Holding Tank Sensors Not Working?
RV holding tank sensors are circuits that are waiting to be completed by the rising water levels, which means that they can malfunction for a variety of reasons.
Debris
The most common reason that RV holding tank sensors stop working is when removable debris like human waste, toilet paper, grease, or food particles cover the sensor, hanging off of it into the liquid below. When this occurs, the debris can complete the circuit, causing the sensor to falsely indicate that the water inside the holding tank has reached that level.
Why? Because when an object that can conduct electricity is shorting the path of the circuit, it changes the resistance that the control board is looking for under normal conditions. This will cause the control board to display a misread of the liquid level.
If debris is the problem you’re dealing with, the problem can be fixed by cleaning the debris off of the sensors, allowing them to read accurately again.
Debris in Black Tanks
In black tanks, if toilet paper is caught on one of the black tank sensors and is hanging down into the liquid at the bottom of the tank, the circuit will close and show that there is liquid in the tank even if you just dumped the black tank.
Debris in Gray Tanks
In gray tanks, food debris can close the circuit between a sensor and the liquid in the tank. However, it’s more common for a film of grease from food, soaps, shampoos, body oils, and other materials to stick to the holding tank wall where the sensors are positioned, which can make paths where water runs from the sensor to the liquid below and closes the circuit.
Mineral Deposits
Another reason that RV holding tank sensors can stop working is when non-cleanable mineral, calcium, or hard water deposits cover the sensor and prevent it from functioning properly.
Mineral deposits can often not be cleaned effectively, and sensor replacement should be considered.
Wiring Problems
RV holding tank sensors can also malfunction if there is a wiring problem. For example, there might be a broken wire from a ring terminal, wire insulation could rub through causing the wire to ground, or the wire might be pinched.
In these instances, the damaged wire will need to be repaired or replaced to fix the problem.
Control Problems
This is the least likely cause of RV holding tank sensor problems, but poor connection at the Molex connector to the circuit board, failed resistors, etc. can also prevent sensors from working.
If the control board has suffered damage, it will need to be fully replaced in order for your sensors to read correctly.
Diagnosing the Problem With Your RV Holding Tank Sensors
The first thing you need to determine is whether your RV holding tank sensors can be fixed by cleaning, or if they need to be fixed by replacing the probes, repairing the wiring, or replacing the control board.
RV Holding Tank Sensors: Can They Be Cleaned?
To determine if your RV holding tank sensors are dirty or broken, there are a few things you can test to help you solve the problem.
Determine if your RV holding tank sensors can be cleaned with these steps:
- Dump your holding tank completely, and allow the tank to fully dry.
- When your tank is verifiably empty and dry, check your sensors. If they read “full” it is likely that you have a wiring issue or control board failure.
This method is effective because if your holding tank is dry, there is nothing to complete the electrical circuit because water is the conduit. This means that even dirty probes won’t provide readings in a dry tank.
If your sensor panel shows water levels in the tank, even in a 100% completely dry tank, that is a surefire way to know that you’re dealing with a wiring problem or failed control board.
However, if you have misreading sensors that show “empty” after you’ve allowed your tank to dry out, but then show level readings as ⅓, ⅔, or full again once you’ve added liquid to the holding tank, that is a sign that you have dirty probes that may be restored by cleaning.
Alternatively, if you have a sensor that is skipped while filling the tank on a camping trip, then you most likely have a sensor that is covered in either debris or hard water deposits.
How to Clean Your RV Holding Tank Sensors
Now that we’ve discussed how RV holding tank sensors work, why they malfunction, and how to diagnose the problem, we are here to provide you with the steps needed to clean them.
Cleaning Black Tank RV Sensors
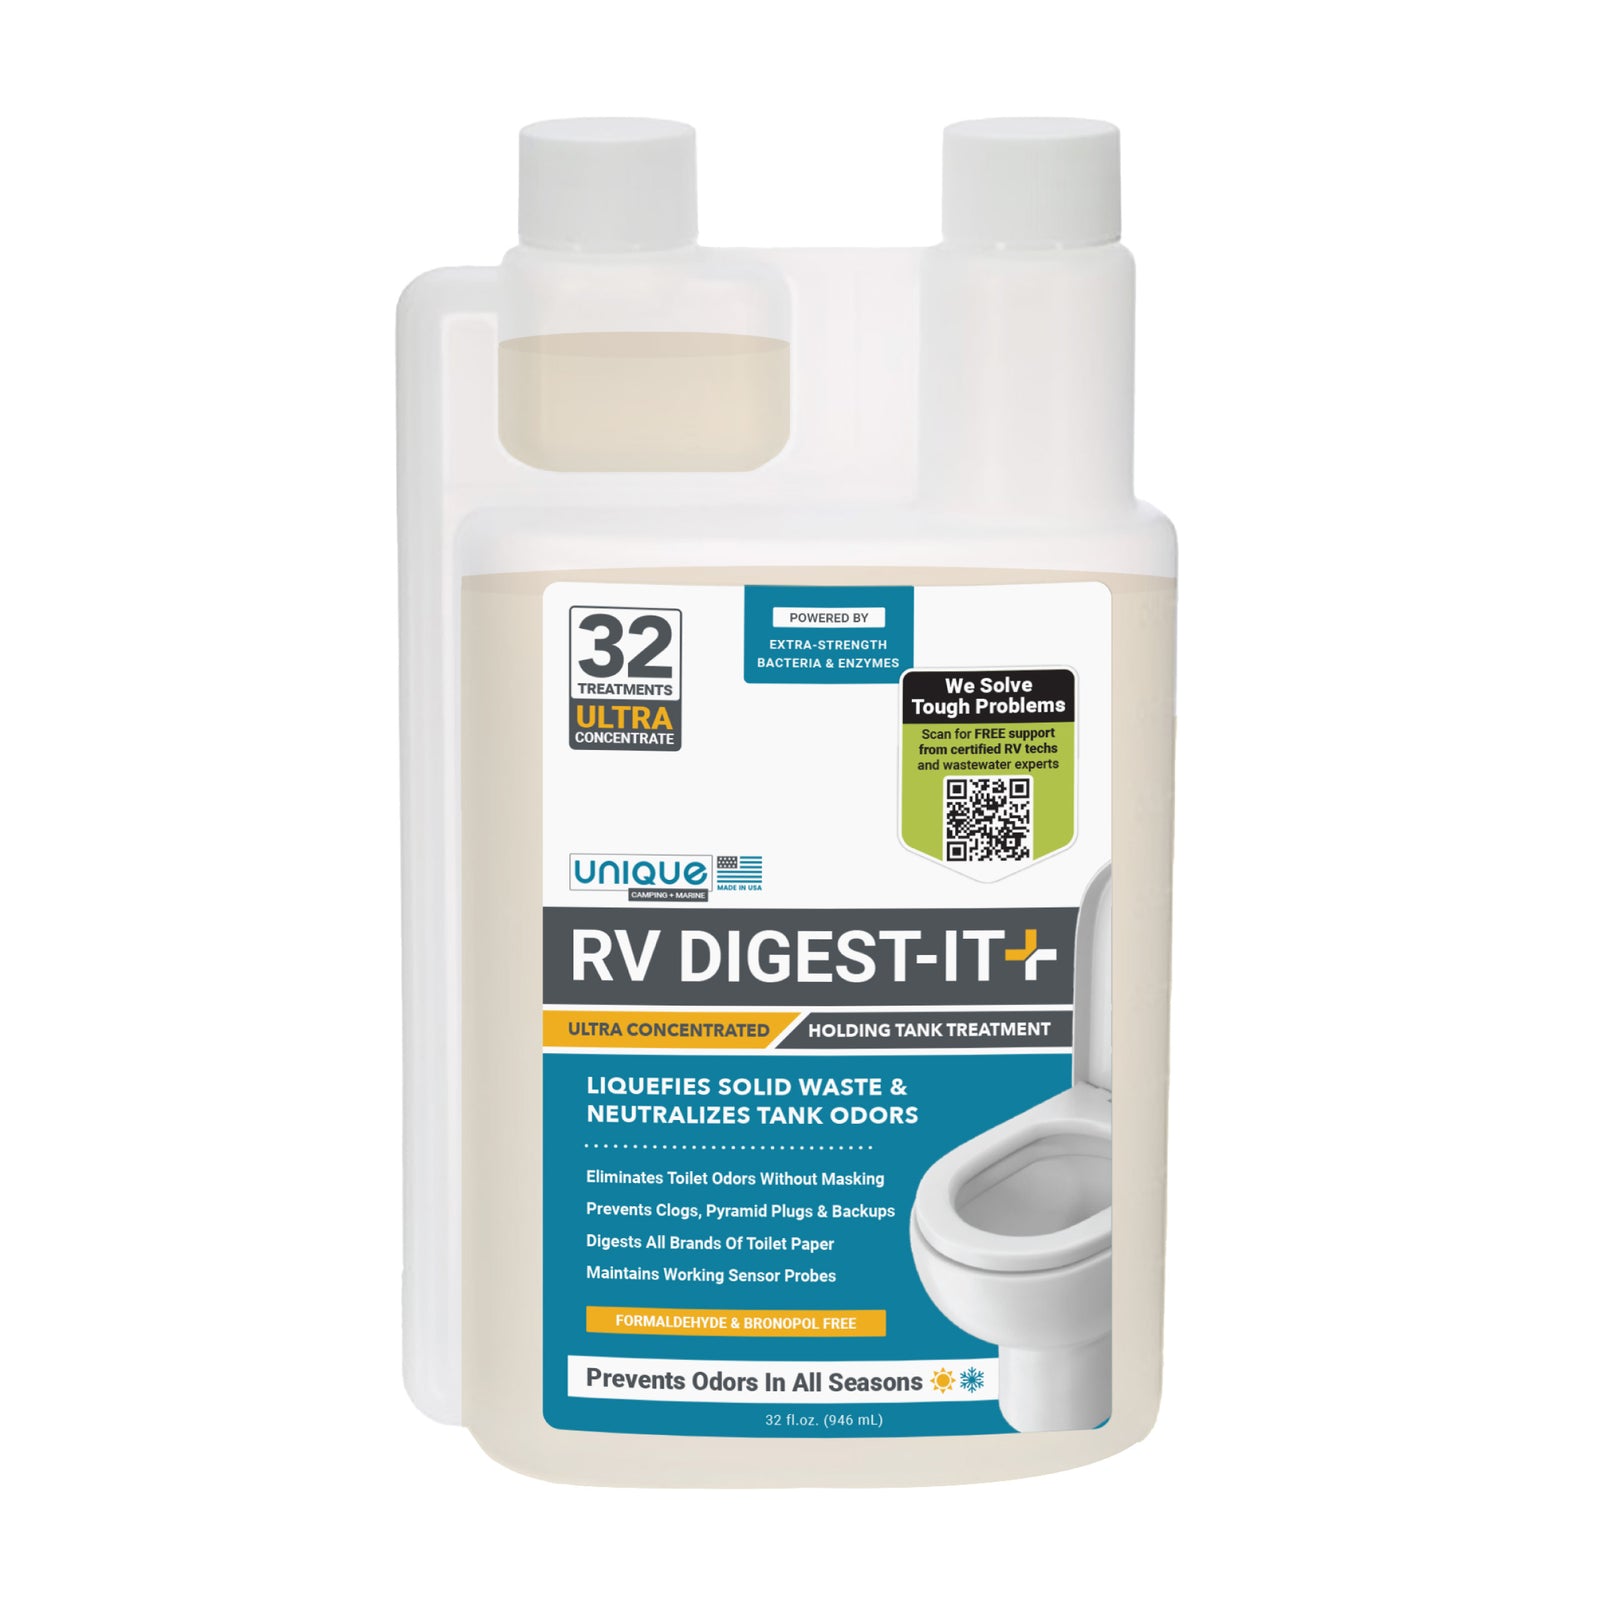
For black tank sensors, we recommend using Unique Restore-It, a product that utilizes bacteria and enzymes to effectively clean and restore your sensors, ensuring accurate readings and a worry-free RV experience.
Guide: Steps for Cleaning Black Tank Sensors
Cleaning Gray Tank RV Sensors
For gray tank sensors, we recommend using Dawn Ultra dish soap because it is the best grease-eating dish soap on the market.
Guide: Steps for Cleaning Gray Tank Sensors
If you want more information about which RV cleaning products are safe, and which ones you should avoid, refer to our guide: Choosing the Right Products or Methods for Cleaning RV Tank Sensors
What If Cleaning Your RV Sensors Doesn’t Fix the Problem?
If you’ve attempted to clean your RV holding tank sensors a few times and they are still misreading, or you routinely struggle with keeping your sensor probes in good working condition, you might want to consider installing exterior-mounted sensors.
The aftermarket sensors like SeeLevel RV Tank Sensors are a great option if you want more reliable readings on tank levels. This is possible because having sensor probes positioned outside of the tank means that waste and grease cannot stick to the sensors and cause them to misread.
Important Note: While exterior-mounted RV holding tank sensors can help resolve some of the major causes of misreading, it is still possible for debris to build up inside of the tank wall where the sensor is, and can still cause it to read incorrectly. For best results, it is important to practice good tank care habits by utilizing The Unique Method.
How to Prevent Misreading Black Tank RV Sensors
In your RV’s black tank, human waste and toilet paper can cake onto the surface of your RV sensors, droop down to the water below, and complete the electrical circuit. This causes your sensors to give false readings that do not accurately reflect the actual water level in the holding tank. Practicing black tank best practices can help you prevent these problems.
For detailed instructions about black tank care, read our guide: How to Prevent Clogs in Your RV Black Water Holding Tank
1. Keep Your RV Black Water Tank Valve Closed
One of the most significant misnomers in the RVing community is that you can leave your black water tank valve open while hookup camping, and everything will flow out of the tank and into the sewer, problem-free.
Leaving your black water tank valve open is one of the fastest ways to develop clogs in your black water holding tank.
When you leave your black water tank valve open, liquid inside your holding tank drains out as expected, but toilet paper and waste are often left behind.
Guide: Why It’s Crucial to Keep Your RV Black Water Valve Closed
Video: Correctly Using Your RV Tank Valves!
2. Use High-Quality Bacteria-Based RV Black Tank Treatments
Keeping your black tank clean is an excellent way to avoid misreading sensors. To prevent waste and debris from blocking sensor probes, you want everything inside of the black tank to be liquefied as much as possible.
The most effective way to keep your black tank free from debris is with a high-quality, bacteria + enzyme based holding tank treatment like Unique RV Digest-It Plus Ultra.
Extra strength bacteria- and enzyme-based products, like Digest-It Plus Ultra, work extremely well because aerobic bacteria break down waste into near liquid form without leaving behind residue and byproducts that could block sensors.
Guide: Why You Should Use a High-Quality Waste Digester in Your RV
3. Use Plenty of Water in Your RV
Water is the best thing you can add to your RV holding tanks.
If you’re using high-quality tank treatments, they require ample amounts of water to be added to the tank so that the bacteria can survive, flourish, and reach the waste. Extra water also helps soften solid waste and break apart toilet paper, which further reduces the chances that debris will still to the sensors.
Guide: Why Using Lots of Water in Your RV Toilet and Tanks is Crucial
4. Rinse Your RV Black Water Holding Tank After Each Dump
RV holding tank sensors are usually positioned on the deep side of the holding tank near the discharge port, meaning that when you dump the tank, all of the liquid and debris flow to the side of the tank where the port is located. This can cause debris to get stuck on the sensors as the liquid drains out.
Even if you are using bacteria and enzyme-based tank treatments to properly liquefy everything in the black tank, waste and debris can get stuck on RV sensors. While high-quality RV holding tank treatments are key, you can still experience misreading sensors if you are not rinsing your black tank effectively after each dump.
Our preferred method of rinsing is filling your black tank completely full with clean water, and then dumping the contents. We recommend repeating this 1 to 2 times to most effectively rinse your black tank.
Important Note: This method is far more effective for thoroughly rinsing a tank than using internally mounted tank rinsers, tank wands, or external tank flushers. Our extensive testing of these external devices has proven that they are highly ineffective for the majority of RV wastewater systems. The only way to be sure you’ve drained all the remaining waste out is to routinely fill and dump your tanks.
Video: How to Rinse a RV Black Water Holding Tank
5. Toilet Paper and Your RV Black Water Holding Tank
Toilet paper is one of the leading causes of misreading black tank sensors, so be mindful about how much you use. You can also opt for rapidly-dissolving toilet paper.
You do not need to buy RV-specific toilet paper, but if you’re not using a high-quality bacteria-based holding tank treatment, then regular home toilet paper can take longer to break down inside the tank, and will be more likely to stick and snag on sensor probes.
For more information about RVs and toilet paper, read our guide: Is RV Toilet Paper Necessary?
6. Regularly Deep Clean Your RV Black Water Holding Tank
Regularly deep cleaning your black water tank is important because keeping the holding tanks clean and free from build up that could cause sensors to misread.
We recommend deep cleaning your RV black water holding tanks based on your usage:
- Recreational campers and weekend warriors: Deep clean twice a year, usually once at the beginning of the RV season and once at the end.
- Full-time RVers: Deep clean after every 10 dumps, or every 3-4 months.
Guide: How to Deep Clean RV Black Water Holding Tanks
Video: You Should Be Deep Cleaning Your RV’s Black Tank!
How to Prevent Misreading Gray Tank RV Sensors
Even the most experienced RVers know that some food waste, residues, and grease may make it into your gray tank. The combination of these items can make a pathway that completes the circuit, and causes gray tank RV sensors to misread. However, if you follow these best practices you can reduce the likelihood that you’ll experience sensor problems.
For detailed instructions about gray tank care, read our guide: How to Unclog RV Gray Tanks and Plumbing
1. Install Strainers or Screens on RV Drains
By installing screens or strainers, you can catch clog-causing items like food particles, hair, and other debris ahead of time. We like these for sink drains, and these for shower and tub drains. Clearing the screens or strainers is very easy, as you can simply throw anything caught in them into the trash, rinse them, and then put them back. This first level of defense can prevent the majority of RV gray water clogs.
2. Avoid Dumping Grease Down RV Sink Drains
When grease is poured down a sink drain, it eventually cools, solidifies, and sticks to the inner walls of the pipes and gray water holding tank, which can cause sensors to misread.
Scraping plates before washing them in the sink, or washing heavily greased dishes at community wash sites, can reduce the amount of grease significantly.
3. Regularly Deep Clean RV Gray Water Holding Tanks
Deep cleaning RV gray water holding tanks is very easy, and only requires water, grease-eating dish soap (Dawn Ultra), and time. The process can even happen overnight while you sleep.
Deep cleaning your RV gray water holding tank ensures that your gray water systems can function properly trip after trip. Hookup campers should deep clean twice a year, while dry campers should deep clean on the last night of every camping trip.
For step-by-step, deep-cleaning instructions, please review our guide: How to Deep Clean RV Gray Water Holding Tanks
Travel Smart, Not Blind: Restoring RV Holding Tank Sensors
Misreading or broken RV holding tank sensors are problems that most RVers have had to face. These sensitive components are circuits that are positioned at various levels inside of holding tanks and are completed by rising water levels.
Debris, mineral deposits, wiring problems, and control problems can all be causes of misreading sensors, but diagnosing your holding tanks by ensuring your tank is completely dry is the most effective way to narrow down the cause of sensor malfunctions.
Cleaning RV tank sensors is the first way to approach the problem, and using bacteria + enzyme-based treatments like Restore-It, can get your sensors back in working order. If cleaning doesn’t help, then sensor or component repairs or replacement may be necessary.
Still struggling with your RV holding tank sensors? Reach out to the Customer Service Team at Unique Camping + Marine for expert advice.


Misreading Sensors? We Can Help!
Misreading tank sensors are very common and in most cases pretty simple to fix! We’ve helped thousands of RVers restore their misreading sensors in their RV black and gray tanks, and this Field Guide (our free downloadable PDF) is going to help you!
Get The Free Download