


Using an RV dump station for the first time can feel a little intimidating. Between the hoses, valves, and concern about making a mess, it’s easy to feel stressed about getting something wrong.
But once you understand the basic process, dumping your RV’s holding tanks is actually simple, straightforward, and easier than you might think — especially if you take steps to dump efficiently and make sure to clean up after yourself.
In this article, we’ll show you how to use an RV dump station respectfully, including when, where, and how to dump your tanks. With a little preparation and a few simple steps, you’ll be able to handle the process like a pro and get back on the road with ease.
Key Points About RV Dumping Stations
- Come Prepared Before You Pull Up: Have your RV sewer hose, fittings, gloves, and any other essentials ready before arriving at the dump station so you can dump efficiently and avoid holding up other RVers.
- Follow Proper Dumping Order & Process: Dump the black tank first and the gray tank afterward to ensure a clean process and to help rinse the sewer hose. Rinse your holding tanks after every dump (when possible).
- Practice Good RV Dump Station Etiquette: Keep the area clean, avoid performing unrelated tasks while occupying the station, and leave the dump station ready for the next RVer.
- Maintain Regular Dumping Schedule: Dump RV black and gray tanks every 3-5 days, rinse after every dump, and only dump at designated locations to protect your tanks and the environment.
Expert Tips & Advice for Dumping Respectfully
Dumping your RV holding tanks can be quick, easy, and sanitary if you follow these expert dumping tips.
1. Align RV With the Dump Station Sewer Port
Getting your RV properly lined up with the sewer port will allow for easier, quicker dumping.
Before pulling into the dump station, make sure you know which side of your RV has the discharge port so that you pull in on the correct side. Nearly all RVs have the sewer discharge port(s) on the driver’s side (left side), however, it is still a good idea to double check.
Dump stations typically have directions for pulling through, and some may even have multiple lanes so you can choose which side to dump from.
Tips for positioning your RV close enough to the RV dump station sewer port:
- Passenger Help: If you have a passenger with you, have them stand alongside the RV to give you a point of reference. Using them as a visual in your mirrors can help you position the RV with the shortest distance to the sewer port.
- Physical Reference Points: If you don’t have a passenger with you, use markers around the dump station to help you orient the RV close to the sewer port. Example markers can be large rocks, painted curbs, or even cracks or pour lines in the concrete. Every dump station is different, so you’ll need to find new physical markers for accurate positioning.
- Don’t Be Afraid to Reposition: If you get it wrong the first time, it’s totally okay to try again. It's faster to start aligned correctly than to battle your waste hose like a rookie snake charmer, only to find you can’t reach the dump station's sewer port.
What should you do if your RV discharge port and the dump station sewer port are on opposite sides?
Keep in mind, some dump stations may not always have connections on the same side as your discharge port.
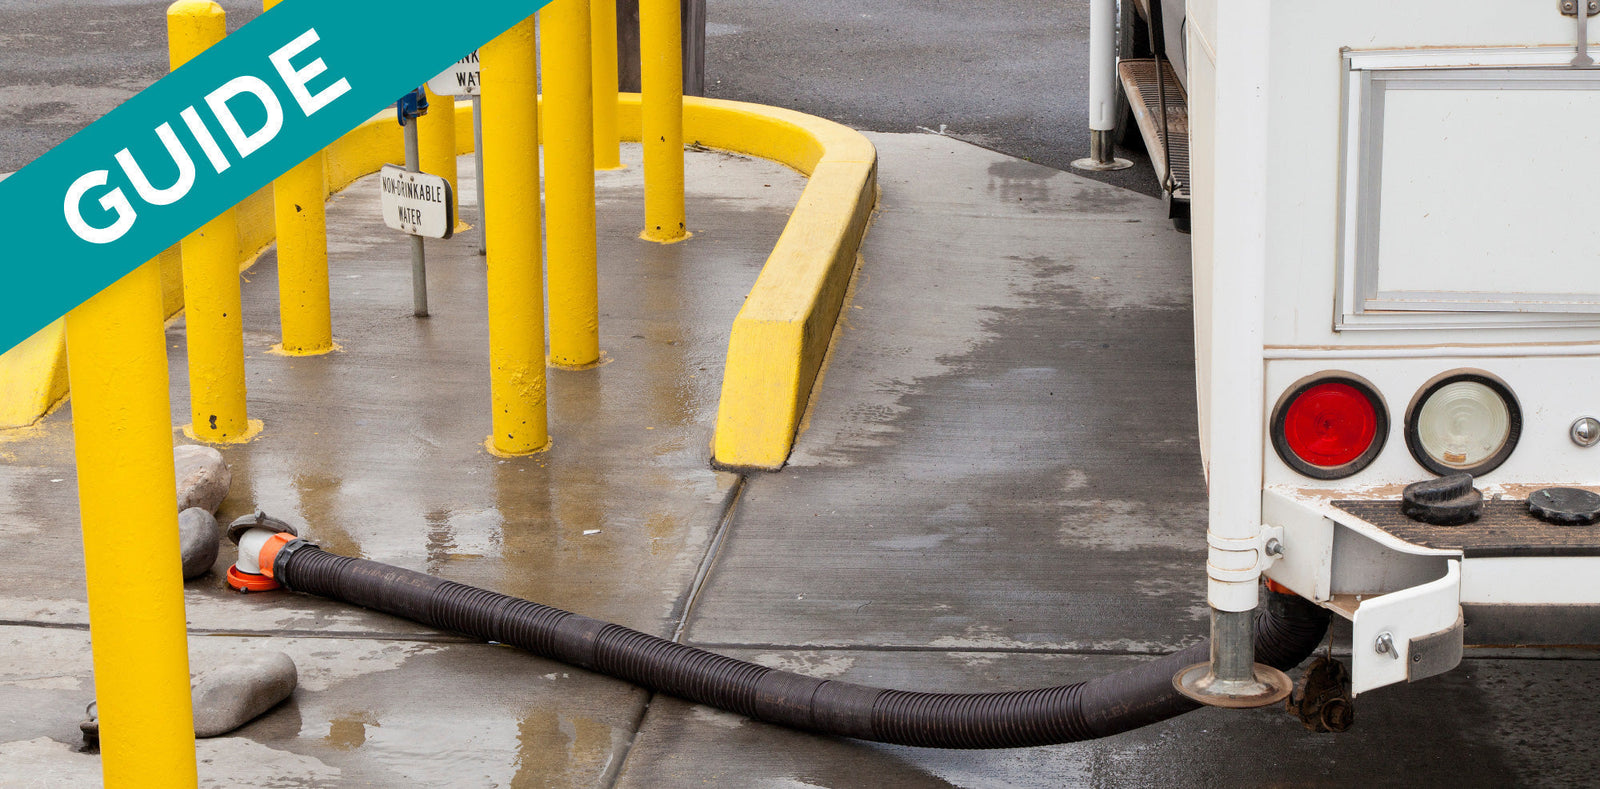
If you find your RV discharge port and dump station sewer port are on opposite sides, you may need to have a very long sewer hose, or multiple connected together (RV sewer hose extension kit), in order to reach the sewer port when you pull the hose under the RV.
2. Keep Dumping Safe & Sanitary
Before you start the dumping process, it is important to be prepared with the proper tools and protective gear. For RV holding tank dumping, it is best to avoid DIY tools and use hoses and extensions that ensure tight seals and non-drip dumping.
We recommend having the following before dumping:
- Disposable Rubber Gloves: To keep you protected and avoid contamination.
- Sewer Hose(s): Long enough to reach the sewer port.
- Sanitary Wipes: So you can wipe down surfaces after dumping and protect the RVers next in line.
- Dedicated Freshwater Hose: We recommend having a dedicated hose (usually defined by a specific color) that you only use for dumping and rinsing purposes.
For a complete list of recommended RV dumping tools, read our guide: What RV Dumping Tools Do You Need? Expert Tips for Care & Storage
3. Dump RV Black Tank First, Then the Gray Tank
Make sure to dump your black tank first, and then your gray tank.
After emptying the black tank, rinse it thoroughly to clear any residual waste before switching to the gray tank. This ensures a clean process and takes less than 15 minutes with practice.
This method also gives you the opportunity to use the soapy water from your gray tank to rinse your sewer hose before putting it back into storage.
4. Rinse Your RV Holding Tanks After Every Dump
Rinsing your RV holding tanks is important because after dumping, waste and debris can often linger in crevices, tank ledges, sensor probes, and low points. As the remaining waste accumulates, it can lead to foul odors, clogs, and misreading sensors.
The most effective way to rinse your RV holding tanks is to fill them completely with clean water and then dump the contents. Repeat this 1-2 times to thoroughly rinse your black and gray tanks.
For thorough rinsing instructions, refer to our guide: How to Rinse an RV Holding Tank
How can you rinse your RV holding tanks when there is a line at the dump station?
If there is a line at the dump station, you should pull forward and move your RV out of the way instead of rinsing your tanks at the sewer port.
While this is certainly less convenient, it’s best to wait and rinse your holding tanks when you’re at a full-hookup campsite or at a dump station without a line.
While we recommend rinsing your RV holding tanks after every dump, there may occasionally be circumstances where skipping a rinse is unavoidable.
5. Inspect RV Wastewater Valves
RV wastewater valves, or gate valves, are sliding metal or plastic barriers that allow you to control the flow of wastewater from your holding tanks to the sewer outlet.
The more you use your RV wastewater valves, the more the gate valve seals will wear out and allow waste to drip through the valve even when closed. This can cause you to spill contaminated water onto the ground, leaving a mess for the next RVer in line.
After dumping and rinsing your RV holding tanks, follow these steps for checking your valves:
- Place a Bucket Under the Discharge Port: Helps to catch any potential drips.
- Slowly Open RV Wastewater Valves & Inspect: Check for debris that may be caught in the path of the knife valve or gaskets.
- Clear Debris: Use the dump station water supply and black-water-specific hose to rinse off the valve and gaskets, allowing everything to drain into the bucket.
- Empty Bucket: Pour contents of the bucket into the dump station sewer port.
Pro Tip: We often recommend twist-on RV wastewater valves that are designed the same way as the manufacturer-installed valves, but they twist on to the end of the discharge pipe. You can add one of these as a backup to prevent dripping from a worn valve.
6. Only Fill RV Freshwater Tank at the Designated Potable Water Supply
We cannot stress this enough — do not use the dump station water supply to fill your freshwater tank. Instead, you should only use designated potable water supply spigots.
After dumping, move your RV out of the way to an allocated potable water spigot (if available) to allow other RVers to begin the dumping process and keep the line moving.
7. Complete Dumping Process in a Timely Manner
Out of respect to other RVers (especially when there’s a line), it’s important to dump your RV holding tanks quickly and efficiently, and then move out of the way.
To help streamline dumping, make sure to store your gloves, adapters, and dedicated rinse hose in a single bin or storage bay to avoid spending time hunting for supplies or untangling hoses at the last minute.
While there’s no need to scramble or rush through the dumping process, you should stay focused on the task at hand and pull forward to complete other cleaning, rinsing, or maintenance tasks.
8. Avoid Performing Non-Dumping Tasks While Connected to the Sewer Cleanout
Dumping your RV’s holding tanks can already be an inconvenience, let alone when the person in front of you has decided to carry out a full cleaning and maintenance routine at the sewer cleanout.
Out of respect to all other RVers, avoid doing the following at the dump station sewer cleanout:
- Talking on the phone or socializing
- Washing dishes
- Taking showers
- Restroom breaks
- Trash removal
- Walking dogs
- Meticulous cleaning
9. Clean Up After Yourself
Just like when you’re at a resort or campground, you should always leave your area cleaner than you found it after dumping.
Once you’ve dumped your RV holding tanks, make sure to throw away disposable gloves and any other waste products in the trash bins at the dump station. In the event that the available trash cans are completely full, or trash cans aren’t provided, don’t simply stack your waste on top of the overflowing trash can or leave it behind.
Instead, put your used gloves, wipes, and any other trash and put them in a plastic bag until you can dispose of them properly at the campground or once you return home.
Make RV Dumping Simple and Stress-Free
Using an RV dumping station may seem intimidating at first, but once you understand the process, it quickly becomes just another simple part of RV life.
By arriving prepared, following the proper dumping order, and practicing good dump station etiquette, you can handle the task confidently and efficiently. With a little practice, dumping your holding tanks will become a quick, stress-free routine.
Having questions about dumping or need help with your RV holding tanks? Contact our stellar Customer Support Team for friendly and helpful advice.
Frequently Asked Questions About Dumping RV Holding Tanks
Still have questions about dumping your RV holding tanks? Check out these frequently asked questions for helpful answers that can make the process even easier and less stressful.
1. When Should You Dump Your RV Holding Tanks?
RV holding tanks should be dumped every 3-5 days or when they read two-thirds to three-quarters full.
Frequent dumping prevents waste buildup, clogs, foul odors, and misreading sensors. Combining a regular dumping schedule and rinsing after every dump (when possible) can help keep your RV holding tanks trouble-free.
Read more about our tips for regular dumping: When to Dump Your RV Holding Tanks
2. Where Should You Dump Your RV Holding Tanks?
RV black water, gray, and freshwater holding tanks all contain possible contaminants for the environment, which means they cannot be legally dumped openly onto the ground, and need to be emptied at designated dumping locations.
RV dump stations can often be found at RV parks & campgrounds, travel centers & truck stops, rest stops & visitor centers, RV dealerships & service centers, marinas, and more. You can use RV apps and websites to help you find the nearest RV dump stations ahead of time, too.
If you want to learn more, refer to our guide: Where to Dump Your RV Holding Tanks
3. How Do You Dump RV Holding Tanks?
Here are simple, step-by-step instructions for dumping your RV holding tanks at a dump station:
- Preparation: Wear gloves and use a dedicated wastewater hose for tank rinsing.
- Close All Tank Valves: Close valves before starting the dumping process to prevent backflow from your black tank into your gray tank.
- Connect Sewer Hose to RV Discharge Pipe.
- Secure Opposite Sewer Hose End to Dump Station Cleanout.
- Dump the RV Black Tank: By opening the black tank valve completely.
- Rinse the Black Tank: If there isn’t a line, fill the black tank completely with clean water and then dump the contents. Do this 1-2 times and your tank will be thoroughly rinsed. Make sure to close your black tank valve before each rinse.
- Close the Black Tank Valve.
- Open the Gray Tank Valve: To dump the gray tank, flush remaining residue, and run soapy water through the sewer hose.
- Rinse & Store the Sewer Hose: Quickly rinse with fresh water and store securely.
- Pull RV Forward: Allow the next RVer in line to start the dumping process while you fill your freshwater tank at a potable spigot and complete any other cleaning, maintenance, or personal tasks away from the dump station sewer cleanout.
For more advice about dumping your RV holding tanks, we recommend reading: How to Dump Your Black and Gray Water Tanks
4. Can You Dump Your RV Holding Tanks at Home?
You may be wondering if you can avoid the lines and fees at a dump station and dump your RV holding tanks at home. The answer is yes, it’s possible, but it greatly depends on your location and your setup.
Before attempting to dump your RV black and gray tanks at home, check all local laws and regulations to make sure you can legally dispose of waste at home. If laws prohibit you from dumping your tanks at home, you’ll have to find a designated dump station
Furthermore, the only time we recommend you dump your holding tanks at home is when you have a professionally installed cleanout attached to a septic tank or city sewer system.
For full instructions about dumping RV holding tanks at home, reference our guide: How to Dump Your Holding Tanks at Home